Easy Nail Art Designs for Beginners Step by Step Guide
Nail art has become a popular way to express creativity and enhance beauty. Many people assume that nail art requires professional skills,…
Nail art has become a popular way to express creativity and enhance beauty. Many people assume that nail art requires professional skills, but the truth is, there are plenty of easy nail art designs for beginners that anyone can try at home. Whether you have nail tools or not, you can create stylish designs effortlessly. This guide will walk you through simple and trendy DIY nail art designs for beginners, including easy nail art for beginners without tools and easy nail art design for beginners step by step, making the process even easier.
Easy Nail Art Designs for Beginners
If you’re new to Nail Art starting simple is key. Begin with a solid base coat to protect your nails, then choose a color you love. For an easy design, try creating cute polka dots with a dotting tool or toothpick. Another simple option is using striping tape to make neat, geometric lines or stripes. If you’re feeling creative, try a gradient effect .Creating stunning nail art at home doesn’t require professional skills. With these easy nail art designs for beginners step by step, you can achieve stylish looks without expensive tools. From DIY nail art designs for beginners to easy nail art for beginners without tools, there’s something for everyone. Start experimenting today and enjoy the process of expressing your creativity through nail art!
Getting Started with Nail Art
Before we dive into the designs, let’s cover some essential tips to ensure your nail art turns out perfectly:
- Start with clean nails – Remove old polish and shape your nails with a file.
- Apply a base coat – This protects your nails and helps the polish last longer.
- Use thin layers of polish – This prevents smudging and speeds up drying time.
- Seal with a top coat – This adds shine and extends the life of your nail art.
Now, let’s explore some amazing easy nail art for beginners without tools and a few with minimal tools for those who have them.
1. Polka Dot Nail Art

One of the simplest yet most stylish designs is the classic polka dot nail art.
How to Do It:
- Apply a base coat and let it dry.
- Choose two colors – one for the base and one for the dots.
- Paint your nails with the base color.
- Use the tip of a toothpick, bobby pin, or a dotting tool to create dots with the second color.
- Let it dry and finish with a top coat.
This design works well with contrasting colors, such as black and white, pink and gold, or blue and silver.
2. Striped Nail Art

If you love chic and minimalistic designs, striped nail art is perfect for you.
How to Do It:
- Paint your nails with a base color and let it dry completely.
- Use thin strips of tape to create stripes.
- Paint a second color over the tape and let it dry.
- Gently remove the tape to reveal the stripes.
- Seal with a top coat.
This method creates neat and stylish stripes effortlessly.
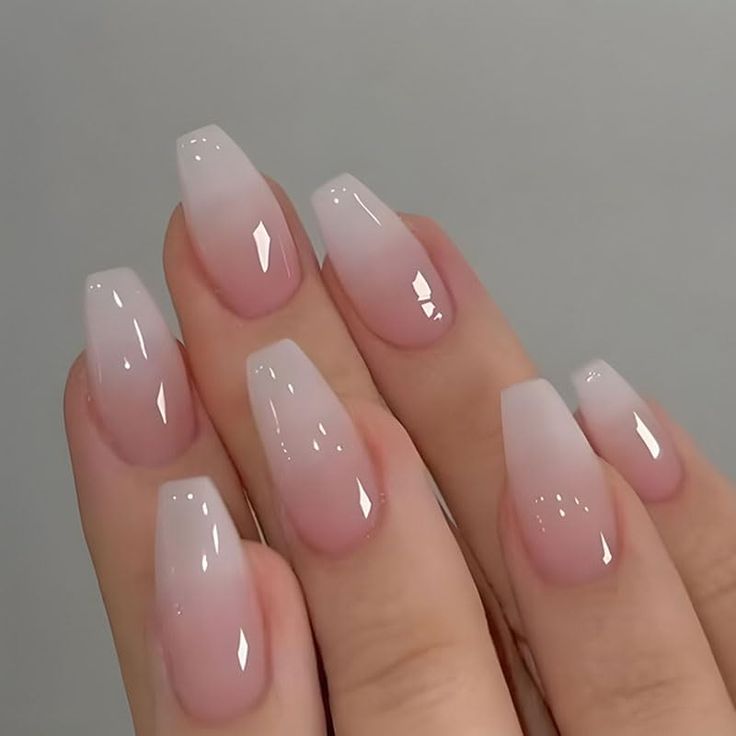
3. Gradient or Ombre Nails

The ombre effect looks professional but is surprisingly easy to achieve.
How to Do It:
- Apply a base color and let it dry.
- Take a small sponge and dab two or three shades of polish onto it.
- Lightly press the sponge onto your nails to create a blended look.
- Repeat the process until you get the desired effect.
- Clean the edges with a cotton swab dipped in nail polish remover.
- Apply a top coat for a smooth finish.
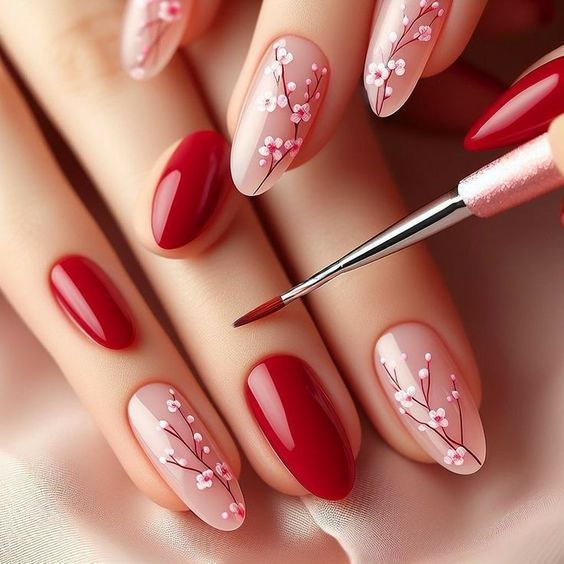
4. Floral Nail Art

Floral designs add a touch of elegance to your nails and can be done easily with a toothpick.
How to Do It:
- Apply a pastel shade as the base color.
- Use a bobby pin or toothpick to create five small dots in a circular pattern.
- Add a dot in the center with a different color.
- Use a fine brush or toothpick to slightly drag the dots to create petal shapes.
- Finish with a top coat.
5. Heart Nail Art

Perfect for romantic occasions, heart nail art is super easy and cute.
How to Do It:
- Apply a light base color and let it dry.
- Use a toothpick or dotting tool to create two dots close together.
- Drag the dots downward to form a heart shape.
- Fill in the heart if needed and let it dry.
- Finish with a top coat for a smooth finish.
6. Newspaper Print Nails

This trendy design gives a unique and artistic touch to your nails.
How to Do It:
- Paint your nails with a light base color.
- Let them dry completely.
- Soak a small piece of newspaper in rubbing alcohol.
- Press it onto your nail for 10-15 seconds, then remove gently.
- Finish with a top coat to seal the design.
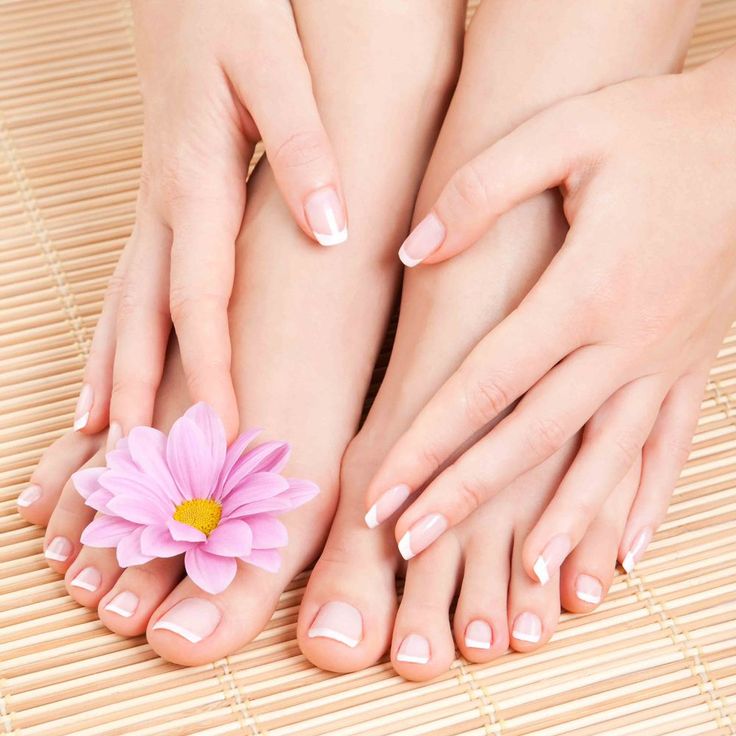
7. French Tips with a Twist

The classic French manicure gets a fun upgrade with colorful tips.
How to Do It:
- Apply a nude or light pink base coat.
- Use a tape or freehand a curved tip with a bright color.
- Let it dry and apply a top coat.
You can experiment with different colors for a fun twist.
8. Glitters Nails

For a glam look, glitter nails are an easy and eye-catching option.
How to Do It:
- Paint your nails with a base color.
- Apply a layer of glitter polish or dip your wet nail into loose glitter.
- Seal with a top coat to keep the glitter in place.
9. Half-Moon Nails

This vintage-inspired design is simple yet elegant.
How to Do It:
- Apply a base color and let it dry.
- Use reinforcement stickers (for hole punchers) at the base of each nail.
- Paint over them with a second color.
- Remove the stickers to reveal the half-moon shape.
- Finish with a top coat.
10. Water Marble Nails

This technique creates a unique design on each nail.
How to Do It:
- Apply a white base color.
- Place drops of different nail polish colors on a plastic wrap.
- Swirl them with a toothpick to create patterns.
- Press your nail onto the design and lift it carefully.
- Clean the edges and seal with a top coat.
Easy Nail Art for Beginners without tools
Easy Nail Art Designs for Beginners (No Tools Required)
Nail art doesn’t have to be complicated or require expensive tools. As a beginner, you can create beautiful designs with just a few basic items, like a bobby pin, a toothpick, or even tape. Here are some easy and stylish nail art designs you can try at home!
Polka Dots
Polka dots are simple and playful. Use a bobby pin or toothpick to create dots on your nails. Start by painting a base coat, then dip the pin or toothpick into your desired polish color and gently dot it on your nails in any pattern you like.
Gradient Nails
For an ombre effect, use a makeup sponge. Apply a base coat, then paint your nails with two or more colors. Dab the sponge on your nails to blend the colors together, creating a smooth gradient.
Simple Stripes
You don’t need tools to create stripes. After applying a base coat, use the edge of tape or even your finger to apply thin lines across your nails in various directions for a fun, striped look.
Negative Space Nails
Create a minimalist design by painting geometric shapes or lines on your nails, leaving spaces to show your natural nail. This gives a sleek and modern look with minimal effort.
Accent Nail
For a simple but stylish design, paint all your nails one color, then pick one nail (usually the ring finger) to stand out with a different color or pattern.
These easy, no-tool nail art designs let you get creative without the need for fancy equipment. Experiment with colors and patterns to find your personal style!
Diy Nail Art Design For Beginners
DIY nail art is a fun and creative way to express yourself, and beginners can easily dive in with a few simple techniques and tools. Start with a basic manicure: clean, trim, and file your nails, then apply a base coat to protect your nails and help your polish last longer. Choose a vibrant or neutral color for your base, and let it dry completely before moving on to designs.
For easy designs, consider using tape to create geometric patterns or stripes. Simply apply the tape in the shape you want, paint over it with a contrasting color, and peel it off once dry. Dotting tools or toothpicks are perfect for creating cute designs like polka dots, flowers, or abstract patterns. Just dip the tool in your chosen polish and gently make dots or lines on your nails.
If you’re feeling adventurous, try using a sponge to create an ombre effect. Apply multiple colors to a sponge, press it onto your nails, and blend the colors together. Lastly, adding a top coat will help seal in your design and keep it looking fresh. With a little practice, your DIY nail art skills will improve, and you’ll have a variety of fun, personalized looks to show off!
Final Tips for Perfect Nail Art
- Experiment with colors and patterns – Don’t be afraid to mix and match.
- Use household items as tools – Toothpicks, bobby pins, and sponges work wonders.
- Be patient – Let each layer dry before adding the next.
- Protect your design – A good quality top coat keeps your nail art looking fresh.


2 Comments