5 Best DIY Hair Masks for Frizzy Hair: Natural Remedies That Actually Work
Oops, frizz. The hair problem that shows up uninvited, especially on humid days, on dry days… well, basically every day. If your…
Oops, frizz. The hair problem that shows up uninvited, especially on humid days, on dry days… well, basically every day. If your hair has a mind of its own and refuses to stay smooth no matter how much serum you apply, trust me, you’re not alone. Many people have really dry and frizzy hair, and they are so worried about how to fix this and what the best DIY masks for frizzy hair are. I’ve been there, brushing my frizzy hair into a puffball and wondering why I even bothered.
Good news? You don’t need fancy salon treatments or expensive products to fix it. Some of the best solutions are sitting right in your kitchen! In this post, I’m sharing the best DIY hair masks for frizzy hair that I’ve actually tried myself using ingredients like bananas, honey, coconut oil, and more. They’re easy, natural, and actually work to make your hair soft, shiny, and a lot less frizzy. and it can help to reduce dandruff and itchy scalp too.
So if you’re ready to say goodbye to frizzy hair and hello to smooth, manageable hair, let’s dive into these homemade hair masks that your strands will absolutely love!
What Causes Frizzy Hair?
Let’s be real, frizzy hair doesn’t just happen out of nowhere. It usually means your hair is thirsty, stressed, or just plain fed up. Before we jump into the magical masks, it helps to understand what’s causing the chaos in the first place.
1. Common Reasons Your Hair Gets Frizzy
- Lack of moisture: Dry hair is frizzy hair. When your strands don’t get enough hydration, they soak up moisture from the air, causing that puffball effect.
- Humidity: Frizz loves humid weather. The excess moisture in the air messes with your hair’s cuticle, making it swell and stick out.
- Heat styling: Frequent use of straighteners, curlers, or blow dryers can strip your hair of its natural oils, leading to dryness and—yup—frizz.
- Wrong hair products: Some shampoos and conditioners have harsh sulfates or alcohols that dry out your hair even more.
- Overwashing: Washing your hair too often can strip away its natural protective oils, leaving it frizzy and dull.
- Towel drying: Using a regular towel to dry your hair can create too much friction, which messes with the hair cuticle and leads to frizz and flyaways.
2. Is Frizz a Sign of Damage?
Not always, but often yes. Frizz can be a cry for help from damaged, broken, or overprocessed hair. Split ends, breakage, and heat damage can all lead to more frizz. That’s why using gentle, moisturizing treatments (like the DIY hair masks we’re about to get into ) can make such a big difference.
Why DIY Hair Masks Are Better Than Store-Bought
If you’ve ever turned a hair mask upside down to read the ingredients list and felt like you were decoding a chemistry book… That’s why I love DIY hair masks. They’re simple, clean, and honestly so effective (and budget-friendly!).
1. Benefits of Using Natural Ingredients
When you use fresh, natural ingredients like banana, coconut oil, honey, or aloe vera, you’re feeding your hair nutrients straight from the source. No fillers, no weird chemicals—just pure goodness. These ingredients are packed with vitamins, antioxidants, and moisture-boosting properties that deeply nourish your hair. Plus, your scalp and hair follicles are less likely to react negatively to something natural. Less itching, flakes, and frizz = a happier hair day.
2. Avoiding Harsh Chemicals in Commercial Hair Products
Let’s be real, some store-bought masks are basically perfumes and preservatives in a jar. Many contain sulfates, parabens, silicones, and alcohol-based ingredients that can actually make frizz worse in the long run.
With DIY masks, you’re avoiding all that mess. You’re in control of what goes into your hair, and you can customize each mask to what your hair needs, whether it’s hydration, repair, or help to maintain frizzy hair.
Best DIY Hair Masks for Frizzy Hair
Now that we know what causes frizz and why DIY is the way to go, let’s get into the good stuff: homemade hair masks that actually work. These recipes are easy, affordable, and packed with ingredients your hair loves. I’ve personally tried a few of these, and trust me, your frizz won’t stand a chance!
1. Coconut Oil and Honey for DIY Hair Mask
Best For: Dry, frizzy, and dull hair
This one’s my go-to on days when my hair feels extra rough and lifeless. Coconut oil deeply moisturizes and smoothes your strands, while honey acts as a natural humectant, locking in all that hydration and giving your hair a soft, shiny finish. It’s like a spa day for your scalp and strands without the spa prices!
Ingredients:
- 2 tablespoons of extra virgin coconut oil
- 1 tablespoon of raw honey
How to Make It:
- Warm the coconut oil slightly (not hot!). Just enough to melt).
- Mix in the honey until fully blended.
- Apply to damp hair from mid-lengths to ends. Avoid the roots if your scalp is oily.
- Cover your hair with a shower cap or old T-shirt.
- Leave it on for 30–45 minutes.
- Rinse with lukewarm water and a mild shampoo.
Why It Works:
- Coconut oil penetrates the hair shaft, preventing protein loss and sealing in moisture.
- Honey smooths the cuticle, reduces frizz, and adds a natural shine boost.
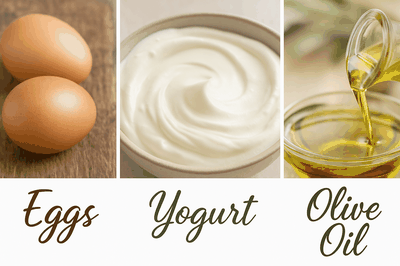
2. Avocado and Olive Oil Hair Mask
Best for: Damaged, dull, and dehydrated hair
This mask is a game-changer when your hair feels lifeless and dry. Avocado is a powerhouse packed with nourishing vitamins and healthy fats, while olive oil works to deeply hydrate and smooth your hair. It’s like a rich, natural conditioner that revitalizes your hair from the inside out!
Ingredients:
- 1 ripe avocado (mashed until smooth)
- 1-2 tablespoons extra virgin olive oil
How to make it:
- Prepare the avocado: Scoop out the flesh and mash it well until you have a lump-free paste.
- Mix the ingredients. Whisk in the olive oil until the mixture is completely combined.
- Usage: Apply the mask to clean, slightly damp hair, focusing on the mid-lengths to the ends, where damage is most noticeable.
- Processing Time: Cover your hair with a shower cap or towel and leave on for 30-45 minutes to allow the nutrients to penetrate deeply.
- Rinse: Wash thoroughly with lukewarm water and a mild, sulfate-free shampoo.
Why it works:
- Avocado: Rich in vitamins E and B, it helps repair hair damage, reduce frizz, and restore lost moisture.
- Olive Oil: Provides intense hydration by sealing in moisture and smoothing the hair cuticle, which reduces breakage and adds a healthy shine.
3. Banana and Honey Frizz Control Treatment
This treatment is a supercharged remedy for managing frizz and infusing moisture into your hair. Bananas are loaded with potassium, natural oils, and vitamins that help repair the hair shaft, while honey acts as a natural humectant, locking in moisture for softer, smoother strands.
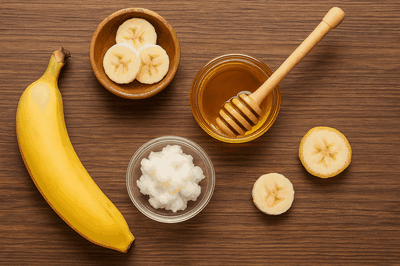
Ingredients:
- 1 ripe banana (mashed until completely smooth)
- 1–2 tablespoons of raw honey
- (Optional: A teaspoon of coconut oil for extra shine and hydration)
How to Make It:
- Mash Thoroughly: In a bowl, mash the ripe banana until you have a smooth, lump-free paste.
- Mix in Honey: Stir in 1–2 tablespoons of raw honey (and the optional coconut oil if using) until well combined.
- Apply: Apply the mixture evenly to dry or slightly damp hair, concentrating on frizzy or damaged areas.
- Let It Sit: For optimal results, cover your hair with a shower cap and leave the treatment on for about 30–40 minutes, allowing the nutrients to deeply penetrate each strand.
- Rinse Out: Rinse thoroughly with lukewarm water, then follow with a gentle shampoo to remove any residue.
Why It Works:
- Banana: Rich in vitamins and natural oils, banana helps repair damage while smoothing the hair’s cuticle. Its softening properties tame frizz and add shine.
- Honey: By attracting and locking in moisture, honey enhances hydration, reduces dryness, and minimizes frizz.
- Combined Power: This duo not only nourishes from within but also works to visibly reduce frizz, making your hair feel more manageable and look healthier after each use.
4. Rice Water and Argan Oil Leave-In Mask
This leave-in treatment is a powerhouse for reviving dull, damaged hair while helping to control frizz. Rice water is celebrated for its protein-rich benefits—supporting hair strength and shine—while argan oil delivers intense hydration and smooths the hair cuticle. The best part? It’s lightweight enough to leave in without weighing your hair down.
Ingredients:
- ½ cup rice water (use freshly fermented rice water for extra nutrients)
- 1 teaspoon extra virgin argan oil
- (Optional: a few drops of your favorite essential oil for fragrance and extra nourishment)
How to Make & Use:
- Prepare the Rice Water:
If you don’t have fermented rice water ready, simply rinse uncooked rice, soak it in water for 30 minutes, and strain it. Fermented rice water (left to sit for 24–48 hours) is even better if you have the time—it enhances the amino acids and antioxidants. - Mix the Ingredients:
Pour the rice water into a spray bottle or a small bowl. Add the argan oil and mix gently. If using, add a few drops of essential oil. - Application:
After washing your hair, towel-dry gently until damp. Spray or apply the mixture evenly throughout your hair, focusing on the mid-lengths and ends. This leave-in formula can be used on both damp and dry hair. - Do Not Rinse:
Since this is a leave-in mask, you don’t rinse it out. Allow your hair to air-dry or style as usual. The lightweight formula helps detangle, boost shine, and tame frizz without leaving a greasy residue.
Why It Works:
- Rice Water: Packed with amino acids and vitamins, rice water strengthens hair, reduces surface friction, and adds a natural shine—making it an excellent base for a leave-in treatment.
- Argan Oil: Renowned for its moisturizing and antioxidant properties, argan oil helps seal in moisture, protects against environmental stressors, and smooths down frizz for a softer, more manageable finish.
Incorporating this rice water and argan oil leave-in mask into your routine once or twice a week can help restore hair health, making it look smoother, shinier, and more resilient over time.
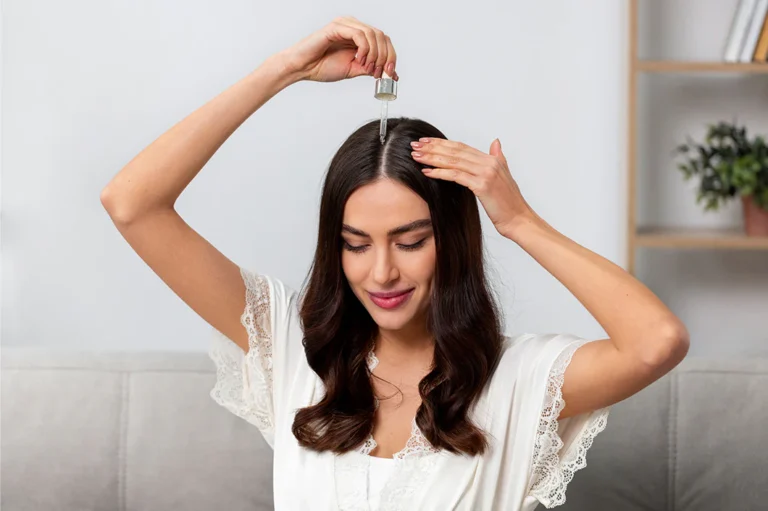
How to Apply a DIY Hair Masks the Right Way
Applying your DIY hair masks correctly is key to unlocking its full benefits. Whether you’re looking to boost hydration, fight frizz, or repair damage, following these steps will help every drop of your mask work its magic.

1. Step-by-Step Application Process
- Prep Your Hair:
Start with freshly washed, damp hair. Gently squeeze out excess water using a microfiber towel or a soft cotton T-shirt—this minimizes friction and keeps your cuticles smooth for better absorption. - Section Your Hair:
Divide your hair into sections (2–4, depending on thickness). This approach ensures that your mask is applied evenly from roots to ends, allowing every strand to soak in the benefits. - Apply Evenly:
Using your fingers or a wide-tooth comb, distribute the DIY hair mask generously through each section. Focus on the mid-lengths and ends where your hair is typically drier and more prone to damage. If your scalp is oily, avoid over-applying at the roots. - Massage for Deep Penetration:
Gently massage the mask into your scalp and hair with your fingertips for 3–5 minutes. This boosts circulation and helps the nourishing ingredients penetrate more deeply into the hair shafts.
2. Processing Time & Rinsing Tips
- Cover Your Hair:
Once your hair is fully coated, cover it with a shower cap or wrap it in a soft towel. This helps trap heat and moisture, which enables the mask’s ingredients to work more efficiently. - Set a Timer:
Leave the mask on for 30–45 minutes. This window allows the ingredients to bond with your hair, repair damage, and impart moisture. - Rinse Thoroughly:
Rinse your hair with lukewarm water to remove any residual mask. Finish with a mild, sulfate-free shampoo if needed, and consider a cool rinse at the end to help close the cuticles and lock in shine.
3. Additional Tips for Best Results
- Frequency Matters:
Use your DIY mask once a week. Overuse might result in build-up or weigh your hair down. - Customize Your Routine:
Feel free to add a few drops of essential oil (like lavender or rosemary) for added nourishment and scent, or mix in a bit of protein if your hair needs extra strength. - Post-Mask Care:
After rinsing, apply a light leave-in conditioner to further detangle and smooth your hair. This extra step helps maintain moisture and prolong the mask’s benefits throughout the week.
By following these steps, you’ll create the perfect environment for your DIY hair masks to flourish, delivering softer, shinier, and more manageable hair every time. Enjoy your at-home spa treatment and get ready to flaunt your beautiful, nourished locks!
Extra Tips to Reduce Frizz Naturally
Along with using these killer DIY hair masks, there are a few extra tricks that can help keep your hair smooth and frizz-free all day long. Whether it’s tweaking your drying routine or choosing the right styling habits, these practical tips can make a big difference.

1. Use a Microfiber Towel or a Soft Cotton T-Shirt
Instead of rubbing your hair vigorously with a regular bath towel, gently blot or scrunch your hair using a microfiber towel or an old cotton T-shirt. This reduces friction, helps maintain your hair’s natural moisture, and minimizes frizz
2. Limit Heat Styling
Frequent use of straighteners, curling irons, and blow dryers can strip your hair of natural oils and lead to more frizz. Allow your hair to air-dry when possible, and if you do use heat, always apply a heat protectant spray beforehand to guard against damage.
3. Finish with a Cool Water Rinse
After washing or rinsing out your mask, finish with a cool water rinse. The cool temperature helps seal the hair cuticles, locking in moisture and giving your hair an extra layer of smoothness and shine.
4. Use a Lightweight Leave-In Conditioner
A good leave-in conditioner can provide additional moisture and help detangle hair, reducing frizz throughout the day. Choose a lightweight formula that won’t weigh your hair down, and apply a small amount to your ends and mid-lengths for added protection.
Additional Pro Tips:
- Regular Trims: Keeping your ends healthy with periodic trims can prevent split ends, which often contribute to frizz.
- Humidifier at Home: In drier climates or during winter, using a humidifier indoors can help maintain moisture levels in the air, benefiting both your skin and hair.
- Silk or Satin Pillowcases: Switching to silk or satin pillowcases reduces friction while you sleep, which can help maintain your hair’s smooth texture.
FAQs About DIY Hair Masks for Frizzy Hair
Absolutely! Most DIY hair masks made with natural ingredients are gentle enough for colored or treated hair. However, it’s always a good idea to do a patch test first. Some ingredients (like lemon juice) might slightly lighten hair over time, so you can adjust the recipe if needed.
for best results, apply your DIY hair mask once a week. Overuse can lead to product build-up or weigh down your hair, while weekly treatments offer enough time for your hair to absorb the nutrients and recover.
Yes, generally they are. Natural ingredients tend to be milder and less irritating than many commercial products. That said, if you have a highly sensitive scalp, avoid ingredients you know trigger reactions (for example, if you’re allergic to certain fruits or oils) and consider consulting with a dermatologist before trying new recipes.